5.3: Silhouettes
- Page ID
- 3125
This lesson will help you learn and practice Silhouettes. In Get the Basics, you'll get explanations and photos to build understanding. In Explore, you'll find additional online resources to learn more. It's important to review and learn from these resources also! You'll have opportunities to practice in Build Your Skills. Finally, answer the questions in Record Your Findings at the end of this topic. Be sure to include information you learned from the Explore resources.
Get the Basics
You've already learned that the direction of light is important for making a 3-dimensional appearance with a 2-dimensional photo by creating shadows. There's a special direction of light effect created when the light comes from behind the subject. Since the subject is solid it blocks the light and looks like a black shape. The black shape with light coming from behind is called a silhouette. A term for light coming from behind is backlighting or backlit.
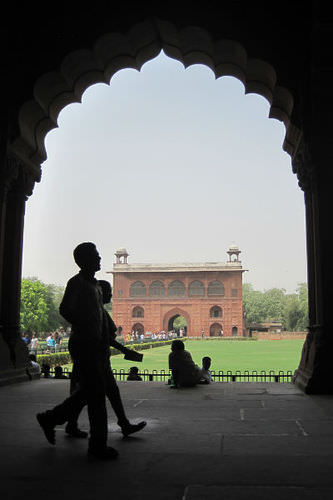
Here is a silhouette that you already saw in the Framing lesson. Notice how the light from beyond the arch creates silhouettes of the people in the foreground.
Now, look at two more examples of silhouettes.
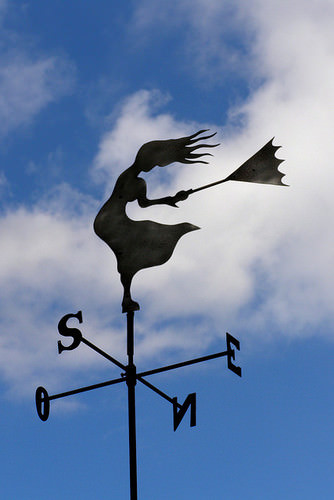
1. This weather vane appears as a silhouette against the bright sky. The shapes of the woman's hair, dress, and umbrella make it look like the wind is blowing hard.
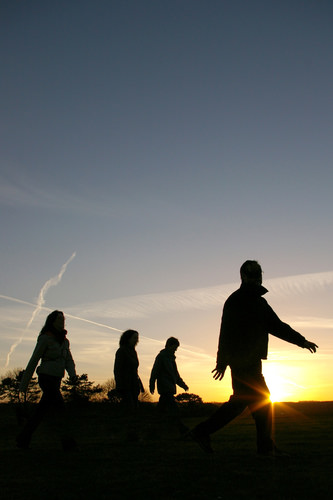
2. These people appear as silhouettes against the brighter sunset behind them.
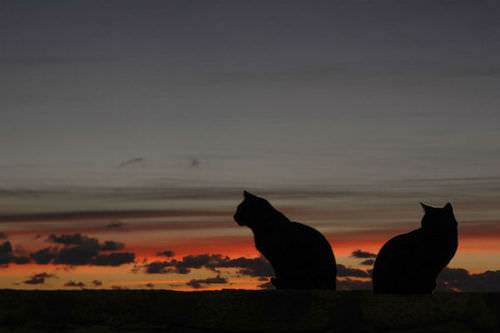
3. Two cats are silhouetted against a sunset as night approaches.
Explore
Learn more about the photographing silhouettes at How to Photograph Silhouettes in 8 Easy Steps from Digital Photography School:
http://digital-photography-school.com/how-to-photograph-silhouettes/
Another online article, Simple Steps for Shooting Amazing Silhouettes, from tuts+ Tutorials provides some great dos and don'ts as well as examples with details on the shutter speed and aperture settings used:
http://photography.tutsplus.com/tutorials/simple-steps-for-shooting-amazing-silhouettes--photo-2447
Using your cell phone? Get silhouette photo tips for your iPhone (or other smart phone such as Android) at How to Take Great Silhouettes With Your iPhone from iPhone Photography School:
http://iphonephotographyschool.com/creating-silhouettes/
Build Your Skills
To build your silhouette skills, shoot FOUR or more photos - no pairs this time. For each photo, choose a different subject, and try to use different backlighting like the sky, a sunset or sunrise, a lamp, light from a window...
Review your silhouette photos. Select four photos. Share your photos with your teacher, and be prepared to discuss how they show what you’ve learned. Download your photos to a computer to keep them for the portfolio you’ll create in the end-of-course final project.
Record Your Findings
- What is a silhouette?
- Describe the direction of light needed to create a silhouette.
- Describe the light sources you used for your selected silhouette photos.
References
| Image | Reference | Attributions |
|---|---|---|
 |
[Figure 1] |
Credit: Wayan Vota; April 23, 2010 Source: https://www.flickr.com/photos/dcmetroblogger/4698282492/ |
 |
[Figure 2] |
Credit: Auntie P; March 29, 2007 Source: https://www.flickr.com/photos/auntiep/460043419/ |
 |
[Figure 3] |
Credit: Dave Morris; January 21, 2006 Source: https://www.flickr.com/photos/davemorris/90173348/ |
 |
[Figure 4] |
Credit: Martin Sharman; December 30, 2005 Source: https://www.flickr.com/photos/sharman/93712076/ |


